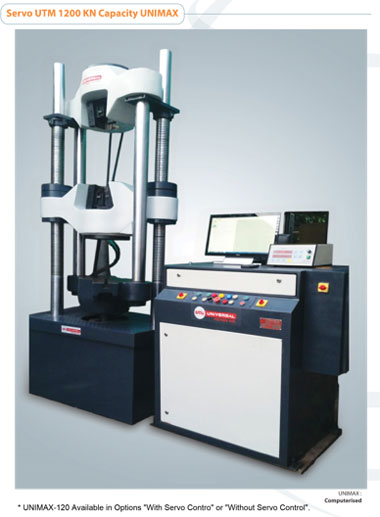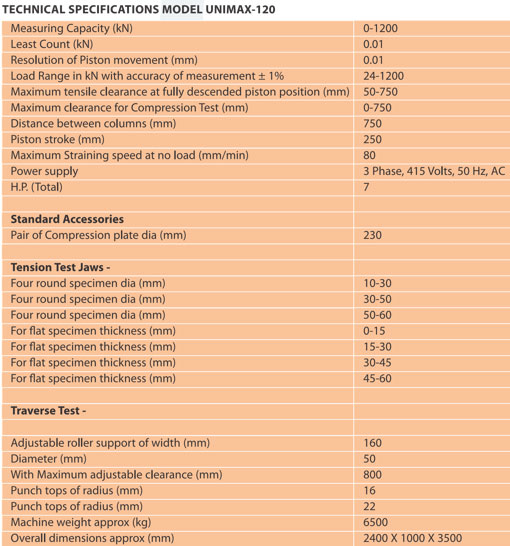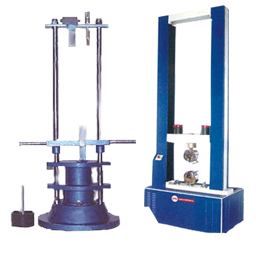
Incorporated Design features To Enable high Accuracy
- Load accuracy as high as +- 1%.
- Straining roll autographic recorder supplied as standard to enable study of the behaviour of materials.
- Motor driven threaded columns for quick & effortless adjustment of lower crosshead to facilitate rapid fixing of test specimen.
- High reading accuracy due to large size and design of mechanical dial.
- Wide range of standard and special accessories, including load stabilizer (optional).
- Easy change from plain to threaded and screwed specimen.
- Large effective clearance between columns enable testing of standard specimen as well as structures.
- Robust Straining frame of an extremely rigid construction.
- Safe operation ensured by means of safety devices.
- Fully enclosed and protected pendulum mechanism in mechanical machines.
Application:
UMI Universal Testing Machine is designed for testing metals and other materials under tension, compression, bending, transverse and shear load. Hardness test on metals can also be conducted.
Principle of operation:
Operation of the machine is by hyraulic transmission of load from the test specimen to a sepearately housed load indicator. The system is ideal since it replaces transmission of load through levers and knife edges, which are prone to wear and damage due to shock on rupture of test pieces.
Load is applied by a hydrostatically lubricated ram. Main cylinder pressure is transmitted to the cylinder of the pendulum dynamometer system housed in the control panel. The cylinder of the dynamometer is also of self lubricating design. The load transmitted to the cylinder of the dynamometer is transferred through a leverage to the pendulum.
Displacement of the pendulum actuates the rack and pinion mechanism which operates the load indicator pointer and the autographic recorder. The deflection of the pendulum represent the absolute load applied on the test specimen. Return movement of the pendulum is effectively damped to absorb energy in the event of sudden breakage of the specimen.
Machine Consists of Straining Unit:
This consists of a hydraulic cylinder motor with chain sprocket drive and a table coupled with the ram of the hyraulic cylinder, mounted on to a robust base. The upper cross-head is rigidly fixed to the table by two straight columns. The lower cross-head is connected to two screwed columns which are driven by a motor. Axial loading by the provision of ball seat.
An displacement elongation scale, with a minium graduation of 1 mm for mechanical machine and 0.1 mm for computerised machine is provided to meausre the deformation of the specimen.
Tension test is conducted by gripping the test specimen between the upper and lower cross-head and the table.
The lower cross-head can be raised lowered rapidly by operation the screwed columns, thus facilitating ease of fixing of the test specimen.
Control Panel:
The control panel consists of a power pack complete with drive motor and a oil tank, control valves, a pendulum dynamometer, a load indicator system and an autographic recorder.
Front Open Crosshead:
Generally in the other standard machines Upper and Middle Crosshead are closed, and one person should stand particulary for inserting the samples. This Machine is designed considering frequent test of heavy specimen and it is very easy to insert and remove the specimen smoothly. In this machine, Upper and Middle are Front Open which is easier to operator for usage frequently.
Hydraulic Gripping:
In this machine we have given Hydraulic Gripping with Push Button wired remote which you can put anywhere on the machine during operation. This is designed considering continuos use and easy to clamp the specimen. Specifically for inserting and Clamping the specimen are very easy and one operator can use this machine very easily. Reduces Manual Fatigue of operation.
Special Features:
Loading Valve (Imported): Highly efficient proportional valve, electrically controlled via potentiometer. High and precise resposne characteristics of the valves make the loading accurate.
Release Valve ( Imported ): Highly efficient valves, electrically controlled via potentiometer wide range of optional accessories available at additional cost as per requirement.
Accuracy and Calibration:
UMI Universal Testing Machines are closely controlled for sensitivity, accuracy and calibration over each of its measuring ranges in accordance with the procedure laid down in British Standards 1610:1964 and IS 18281975 and BS 4449.
Loading Rate Control Range:
As Below. Accuracy:+- of loading rate selected Minimum. 1.009kN/sec. Maximum 40kN/Sec Capacity 1200 kN.
Straining Rate Control Range:
As Below. Accuracy:+-5% of Loading rate selected Minimum 0.5 mm/min Maximum 80mm/min Capacity 1200 kN.


